Best Aquarium Heater Position Guide
As an Amazon Associate we earn from qualifying purchases.
This best aquarium heater position guide explains where a submersible heater should sit so warm water reaches the whole betta tank rather than one corner. In short, place the heater fully underwater, close enough to the filter outflow that moving water carries heat across the tank, and away from gravel, decor, and the glass corners where heat gets trapped. Then put an independent thermometer at the far end of the tank from the heater so you can check the result. Bettas do best at roughly 77 to 82 degrees Fahrenheit, and the position you choose decides whether that range holds from one end of the aquarium to the other.
Quick answer
- Keep the heater fully submerged, following the minimum water line in its own instructions.
- Place it close to the filter outflow so circulating water spreads heat, but not in a jet that pushes a betta around.
- Keep it clear of gravel, plants, and decor that can block flow or sit against the glass.
- Put a separate thermometer at the opposite end of the tank and compare readings after the heater has cycled for a day.
Two related guides on this site cover the wider setup. Read our betta tank setup guide for the full equipment list, and our article on whether bettas need a heater for the temperature reasoning behind this placement advice. The points below assume you have already decided to heat the tank.
Why position matters more than wattage alone
Many buyers start by asking how many watts they need, and that question matters. A heater that is too weak will never reach the set point in a cool room, and one that is far too strong can overshoot in a small tank. But a correctly sized heater placed in a poor spot still produces a tank with warm and cool zones. Water is dense and moves slowly unless something pushes it. A heater sitting in a still corner warms a small pocket of water around its glass tube, while the water a few inches away stays cooler. The thermostat reads the warm pocket, shuts off, and the rest of the aquarium remains below target.
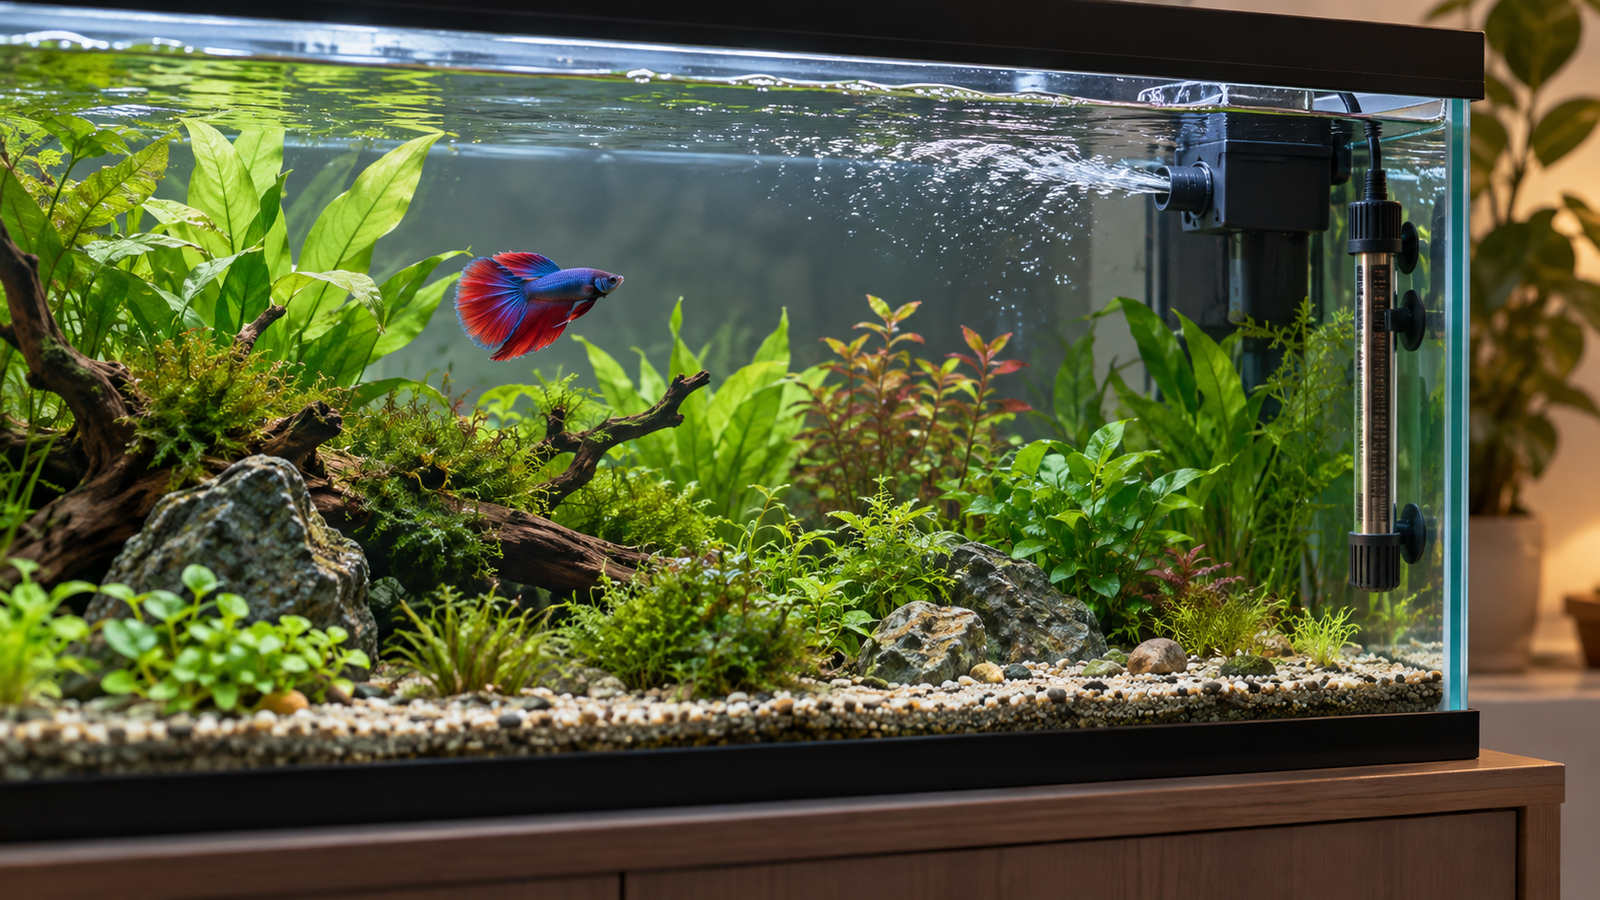
Position solves this by using the movement you already have. Most betta setups run a filter that pulls water in and pushes it out across the surface or through a spray bar. If the heater sits where that outflow passes over its body, the moving water carries warmth away from the element and into the rest of the tank. The thermostat then sees a more representative temperature, and the heater cycles less often to hold the set point. Good placement therefore saves energy and reduces the swings that stress fish over a day.
Placement also affects safety. A heater that sits against gravel can have its element partly buried, and the trapped heat has nowhere to go. A heater pressed against the tank wall with a plant leaf wrapped around it may overheat locally. Neither problem shows up on the packaging, which is why the position needs a deliberate choice rather than a guess made while lowering the unit into the water.
Step 1: Map where the filter water goes
Before you fix a heater in place, watch the tank for a few minutes with the filter running. Note where water leaves the outlet, which direction the surface ripples travel, and where the water returns to the intake. Most aquarium filters draw from one end of the tank and discharge at the other, so a diagonal current usually crosses the middle. Find the stretch of that current where the flow is steady but not violent. That band is the working zone for the heater.
PetSmart’s betta care page gives the core reasoning for this step. It states that a large aquarium may need a heater at either end, and that the heater should be placed “close enough to the filter to distribute the warmed water.” The phrase is short, but it captures the goal. The heater is not meant to sit in the filter stream itself. It should be close enough that the current picks up heat as it passes.
If the tank is small, roughly one to five gallons, the choice is usually easy. One compact heater placed near the outflow will spread warmth through the water within a few inches. For a longer tank of ten gallons or more, a single heater on one side can leave the far end cool, which is why the thermometer test in the final step matters. Some keepers use two smaller heaters in opposite corners rather than one large unit, though that adds cost and cords and is not necessary for every tank.
Step 2: Choose horizontal, diagonal, or vertical carefully
Orientation is the second decision. Most submersible heaters come with suction cups, and the common options are a horizontal placement along the back glass, a diagonal angle, or a vertical placement along a side wall. Each has trade-offs. A low horizontal placement keeps the element low where cool water collects, but it also sits closest to the substrate, so you must confirm there is room beneath the heater for the heating section to stay clear of gravel. A vertical placement uses the full water column and can be easier to see, yet it can sit in a dead zone if the filter pushes water only across the top.
The listing details for the picks below show that several heaters are designed for either orientation. The hygger HG142 listing, for example, says the suction cups allow installation “vertically or horizontally on the tank wall.” That flexibility is useful, but it does not mean every orientation works in every tank. Pick the orientation that keeps the entire heating section underwater and in the moving stream. If the heater must sit at an angle to fit the filter outflow, angle it so the water pushes across the glass and does not stagnate behind it.
A practical test helps here. Hold the heater in your chosen spot for a moment after filling, then observe whether the surface ripple or a stream of bubbles from the air line crosses its body. If no water moves across it, try a position a few inches closer to the outflow. If a strong jet hits it directly, move it sideways a little so the current glances across it instead.
Step 3: Respect the water line in every case
Every heater in this guide has a minimum water level, and the heating section must stay under water whenever power is on. The Orlushy listing states this directly: the heater must be “100% submerged into the water before plug in the power.” The DaToo listing says that when in use the heater “needs to be submerged 100% in water.” The HITOP 50W listing says to keep the heater “fully submerged while powered on.” These are not suggestions. An exposed heating element can overheat and crack, and some models have an out-of-water protection that shuts them down only after the damage starts.
This rule also governs the water-change routine. Before you lower the level for maintenance, unplug the heater and let it cool. The Orlushy listing advises unplugging and cooling the heater “for 10-20 minutes before taking it out to clean the fish tanks or change the water.” The hygger 50W digital listing gives a 15-minute cooling window. Glass heaters keep heat for a while after power is removed, and pouring cold replacement water onto a hot glass tube risks cracking. Plan the water change so the heater is cooled first, then move it, clean around it, and return it to the same position.
Mark the minimum water line on the outside of the tank with a strip of tape if you want a reminder. Water evaporates more quickly from a tank with a lid removed or in a warm, dry room, so the level can drop between changes without anyone noticing. A heater that worked well at full water can be partly exposed a week later.
Step 4: Keep the heater away from substrate and decor
Gravel, sand, and large decor create two problems for heater placement. First, they can block the water path and reduce circulation around the heating section. Second, they can trap heat against the glass or the element. PetSmart’s betta page warns about localized overheating in the context of placement, and the logic is simple: a heater pressed into a cave, a plant cluster, or a thick layer of gravel gets rid of heat slowly, so its own sensor reads a temperature that does not match the rest of the water.
Leave open water on all sides of the heater if you can. A clear gap of a few centimeters between the glass tube and any decor is a sensible target. Keep tall plants from wrapping around the heater, and avoid burying the lower end under substrate when you rearrange the aquarium. If you prefer a natural look, place a plant at the side of the heater rather than directly over the element.
Substrate also affects the thermometer reading. Water sitting over a deep bed of gravel can stratify less than open water, and a heater buried in the substrate may show a warm reading while the top of the tank stays cooler. Clean the gravel according to the guidance on your tank setup, rinsing it before use. The PetSmart page advises rinsing gravel before it goes in the aquarium and never using soap, and that advice applies equally when you clean around a heater.
Step 5: Place the thermometer where it will tell the truth
The heater should not be the only source of temperature information in the tank. The NT Labs article on tropical aquarium thermometers explains why. It states that “the design of a typical aquarium heater means the heating element is directly underneath the thermostat,” and that this “can lead to the heater not reading the true water temperature.” It also notes that “heaters over time can also become uncalibrated from what their temperature is set to and the temperature they heat to.” An independent thermometer gives you a check that does not depend on the same sensor.
The NT Labs page recommends placing the thermometer “at the opposite end of the tank to the heater.” That placement is the most useful test of your heater position. If the heater sits near the left-hand outflow, the thermometer goes on the right side near the far glass, away from the element and out of direct current from the heater. Read it after the tank has been running for several hours, and again the next morning. A reading that is steady at the target across both ends means the position is working. A consistent gap of several degrees suggests the heater needs to move closer to the outflow, or that the filter needs redirecting.
Many heater kits include a sticker thermometer. Those are convenient but measure the glass surface more than the water, so treat them as a rough guide rather than a precise check. A digital probe or a quality liquid-filled thermometer placed in open water is more reliable for judging position. The HITOP 50W listing includes a sticker thermometer, and the DaToo listing states that it includes a thermometer sticker as well. Use them as a second opinion, and add a separate probe if you want the best answer.
Step 6: Think about the dry side of the cord
A perfect underwater position is incomplete if the power end is unsafe. Plugs and controllers should stay out of splash range. Form a drip loop in the cord so water runs down and away from the outlet rather than along the cord into the socket. Keep the outlet off the floor where water from a spill or a water change can reach it. The HITOP 50W listing gives a 5-foot cord, and the AQUANEAT listing gives a 6-foot power cord, both long enough to route the cord behind the tank in most setups. Measure before you commit to a position, because a heater placed on the far side of a large aquarium may need a cord that cannot reach the nearest outlet.
Also consider the cord near the filter. Filter tubing and heater cords can tangle, and a heater pulled sideways by its cord can lose its suction and float or tilt. Check the setup a day after installation and make sure the heater has not shifted.
Step 7: Account for the room and the lid
Room temperature affects how much work the heater does. A tank in a cold corner loses heat through the glass and the top of the water. A tank in direct sun can warm too quickly during the day, which means the thermostat may switch off and the water still climbs. The Merck Veterinary Manual’s guidance on fish housing notes that “direct sunlight can also cause the water temperature in the tank to rise.” A tank placed away from windows and drafts will hold a steadier temperature with any heater position.
A lid or hood reduces evaporation and slows heat loss from the surface, which often lets the heater hold the set point with less cycling. Leave a small gap for air exchange and keep the cord out from under the lid. If you run a light fixture on the hood, check that the light does not sit directly over the heater’s control display in a way that blocks the readout.
Step 8: Keep the betta’s resting area in mind
Heater position also affects where a betta rests. Bettas often hover near the surface and in calm spots near plants. A heater placed in a strong return jet can make a betta struggle to stay in its favorite area. The goal is smooth movement that carries heat without creating constant turbulence. If your betta spends most of its time in one corner, watch whether the filter current pushes it away from that corner, and adjust the outflow direction before you move the heater. Filter direction is often easier to change than heater position.
Keep the heater where you can see its indicator light from the front of the tank. An indicator that you cannot see is one you will not check. The hygger HG273 listing describes red and green indicator lights that show heating and standby. Those lights only help if you can read them without moving the aquarium.
Comparing the five heater picks for placement
The table below lists the five heaters in this guide and the details each listing states. Only the stated figures are included, and a cell reads “not stated” when the listing does not give that detail. The purpose is to help you match a heater to the tank size and placement plan you have already mapped.
| Heater | Stated wattage | Stated tank range | Stated temperature control | Placement note from listing |
|---|---|---|---|---|
| Fluval M 50-Watt Submersible | 50 watts | Up to 15 gallons | Computer-calibrated thermostat with dial | Slim profile tube for discreet positioning |
| HITOP 50W Adjustable | 50W | 6 to 15 gallons | Adjustable 68 to 93 °F, within ±2 °F stated | Install at any angle with suction cups; keep fully submerged |
| DaToo Mini 25W | 25W | 1 to 6 gallons | Preset to 78 °F per listing | Must be 100% submerged when in use |
| hygger Small Betta Heater | 10W (listing family includes 25W, 50W, 100W) | 1 to 5 gallons for the 10W model | Temperature range 59 to 93 °F, LED display | Thumb-size body of about 4.1 inches; external controller |
| Orlushy Submersible | Listing offers six sizes | Not stated for each size | Stair-shape heating with separate thermometer | 100% submerged before plugging in |
1. Fluval M 50-Watt Submersible Aquarium Heater
The Fluval M50 is a 50-watt submersible heater from a brand that many keepers already know from filters and lights. Its listing describes a computer-calibrated thermostat with an easy-to-adjust dial, a slim profile tube, and a body built from borosilicate glass and a ceramic heat sink. The listing says it is suited to freshwater and saltwater tanks up to 15 gallons. The reflective finish is intended to blend into the tank, which matters if you place the heater in a visible spot near the outflow.
Why choose it: For a betta tank in the 10 to 15 gallon range, the slim tube gives you room to tuck the heater beside the filter outflow without crowding the water column. The listing’s emphasis on even heat distribution through its ceramic heat sink fits the placement goal of this guide.
Limitation: The listing does not state the exact accuracy of the built-in thermostat, and it does not describe how the heater behaves if the water level drops below its minimum line. Confirm the minimum immersion mark in the manual before you position it.
Skip if: Your tank is under about five gallons, because a 50-watt unit is oversized for a very small volume and can overshoot if the thermostat cycles poorly. Also skip it if you need a heater with a visible digital readout, since the listing describes a dial rather than a display.
2. HITOP 50W Adjustable Aquarium Heater
The HITOP 50W Adjustable heater is built for tanks listed at 6 to 15 gallons. Its listing describes a compact body about 7 inches long, a 5-foot power cord, and 2-millimeter thickened quartz glass. The stated control range is 68 to 93 degrees Fahrenheit, with the heater switching on and off automatically once the set point is chosen. The listing also includes a sticker thermometer and three suction cups, one of which is a spare.
Why choose it: The suction cup design lets you install the heater at any angle, which suits a diagonal position in the filter current. The 2-millimeter glass is a stated safety feature that can matter in a tank where the heater sits close to decor or the glass wall.
Limitation: The listing states an accuracy of within ±2 degrees Fahrenheit. That is a useful figure, but it means the water can sit a degree or two from the set point, so a separate thermometer is still the best check of your position.
Skip if: You need a heater for a tank smaller than about six gallons, since the listing targets 6 to 15 gallons. Skip it also if you want a digital display, because this model is a dial-and-thermostat design.
3. DaToo Mini Aquarium Heater 25W
The DaToo Mini 25W is a small heater intended for betta and desktop tanks. Its listing describes a body roughly 0.2 inches thick, quartz glass, and a rubber sealing layer at the ends. The listing states that the heater keeps water near 78 degrees Fahrenheit without needing a set point, with a red light while heating and a green light when the target is reached. The listing says it suits tanks of about one to six gallons and that the heater must be fully submerged in use.
Why choose it: In a small betta tank, a compact heater leaves more room for plants and hides more easily beside the filter outflow. Its small size means you can position it in a moving stream without blocking the view of the fish.
Limitation: A fixed preset of 78 degrees is convenient but leaves no adjustment, so if your room runs cooler and you want the water a degree or two higher, this heater cannot be tuned for it. Check the temperature with an independent thermometer before relying on it.
Skip if: Your tank is larger than about six gallons, since the listing does not target that size. Skip it also if you need to change the temperature for a species that prefers a different range.
4. hygger Small Aquarium Betta Heater (10W, 25W, 50W, 100W family)
The hygger small betta heater listing covers a family of wattages, and the 10-watt version is the one most suited to very small tanks. The listing describes a body about 4.1 inches long, a 2-millimeter quartz glass tube, and an LED digital display on an external temperature controller. The stated temperature range is 59 to 93 degrees Fahrenheit. The listing also describes overheating and out-of-water protection, with error codes shown on the controller: HH for high temperature and E1 for being out of water.
Why choose it: The external controller lets you read and set the temperature without reaching into the water, and the compact body fits in the narrow space beside a filter outflow. The stated error codes give you a way to notice a placement problem quickly.
Limitation: The listing shows the 10 watt version for tanks of 1 to 5 gallons, and the family title includes larger wattages that are not for the same tank size. Check that you are buying the wattage that matches your tank, not just the family name.
Skip if: Your tank is bigger than five gallons and you buy the 10 watt version, since the listing does not target it. Skip it also if you cannot route a cord to the external controller in a convenient spot.
5. Orlushy Submersible Aquarium Heater
The Orlushy submersible heater comes in six sizes, according to its listing, and includes a separate thermometer for monitoring water temperature. The listing describes a stair-shape heating pattern in which the red light shows the heater is active and the green light shows it is holding temperature. The heating rod is described as nickel-chromium wire inside quartz glass, with an ABS outer shell. The listing carries a one-year warranty statement.
Why choose it: The separate thermometer included with the heater is useful for the cross-check in Step 5, and the multiple sizes let you match the wattage to the tank volume rather than pushing one model into every setup.
Limitation: The listing does not give a tank range for each of the six sizes in the main bullets, so you must consult the size chart before buying. Without that chart, you cannot confirm the wattage matches your tank.
Skip if: You cannot find the size chart for the exact model you are considering, since the listing says to choose by the chart. Skip it also if you need a heater with a digital display rather than indicator lights.
How to position the heater in four passes
Use this routine the first time you install any heater from the table above. It takes about an hour and avoids most placement mistakes. Start by filling the tank and checking that the filter runs before you plug in the heater, since the Merck guidance on setting up a fish tank says that “filters, pumps, heaters, and lights should not be turned on until after the tank is filled with water.” Then follow these passes.
- Pass one: Fill the tank to a level above the heater’s minimum mark, and confirm the filter outflow direction.
- Pass two: Place the heater at the spot you mapped, angled so water crosses the glass, with open water around it and no substrate touching the heating section.
- Pass three: Plug in the heater and set it to your target. Leave it running for several hours without moving it.
- Pass four: Read an independent thermometer placed at the far end of the tank, compare it with the controller or indicator, and adjust the heater position if the gap is more than a degree or two.
Repeat the routine after any change to the filter, the decor, or the water level. A reposition that fixes one tank can create a new cool spot if you rearrange the plants. Keep a short note of the reading and the position, so you can return to a setup that worked.
Common placement mistakes
Most heater problems in betta tanks come from a short list of mistakes. The first is placing the heater in a dead corner because the cord looks tidier there. The second is letting a heater sit on top of gravel where the element cannot shed heat. The third is aiming the filter directly at the heater, which strips heat from the glass and can make the thermostat cycle rapidly. The fourth is trusting only the controller’s display. A digital readout shows the reading at one point, and it does not show the temperature across the whole tank.
A fifth mistake is repositioning the heater after a water change without checking the water level. Refill to the normal line, let the filter run, and confirm the heater is still underwater before you walk away. A heater that was fully submerged before the change can be partly exposed afterward if the water was not refilled to the same level.
FAQ
Does the heater have to sit right next to the filter outflow?
It does not have to sit in the stream, but it should be close enough that moving water crosses its body. PetSmart’s guidance says to place the heater “close enough to the filter to distribute the warmed water.” A few inches from the outflow is a sensible starting point in most tanks.
Should the heater be horizontal, diagonal, or vertical?
Any orientation can work if the heating section stays fully underwater and in the moving water. A low horizontal position keeps the element near the cool bottom water, while a diagonal or vertical position may suit a tank with a strong filter current on one side. Test the position with a thermometer rather than choosing by appearance alone.
How far should the heater be from the substrate?
Leave open water on all sides of the heating section, and do not let gravel or decor press against the glass. The element needs free water to shed heat. If the suction cups allow it, mount the heater so the lower end clears the substrate by a clear margin.
Why does my heater read a different temperature than my thermometer?
The NT Labs article explains that a heater’s sensor sits directly beneath or beside the element, so it may not read the true water temperature. Heaters can also drift out of calibration over time. Use an independent thermometer at the far end of the tank as the reference, and treat a persistent gap as a reason to check the position or replace the heater.
What temperature should the water be for a betta?
PetSmart’s betta care page gives a range of about 77 to 82 degrees Fahrenheit (23 to 27 degrees Celsius). Aim for a steady value inside that range rather than chasing a single number, and keep the heater position stable so the temperature does not swing through the day.
Can I use a heater rated for a larger tank in a small betta tank?
Choose a heater whose stated range matches your tank. A heater rated for a larger volume can overshoot in a small tank, and the listings in this guide each state the tank range they target. If you are between sizes, check the manual and the thermometer before you rely on it.
Bottom line
The best aquarium heater position puts the heating section fully underwater, close to the filter outflow so moving water spreads the warmth, clear of gravel and decor, and checked against an independent thermometer at the far end of the tank. Pick a heater whose stated tank range and control method fit your aquarium, then spend the extra few minutes on placement. A well-placed heater of moderate size will serve a betta better than an oversized one tucked into a still corner.
For a wider look at betta heating choices, read our guide to the Best Aquarium Heater for Betta Fish: 6 Safe Picks and our article on the Best Betta Water Heater for 5-Gallon Tanks. Both expand on the sizing and control questions raised here.
How we chose
We built this guide from five heaters in the site’s product file for betta tanks, covering small, medium, and adjustable designs. Each pick is included because its listing states a wattage, a tank range, or a control method that matches one placement situation. We left out models whose listings gave no tank range, and we did not infer a range from the wattage. The comparison table reports only what the listings state, and it marks missing details as not stated.
What we could not verify
The three sources opened for this guide describe placement principles, a betta temperature range, and the value of an independent thermometer. They do not measure flow rates, heating times, or temperature uniformity for any of the five heaters, and no test data was available for their accuracy in a particular tank. Listing claims about thermostat tolerance and protection features come from the sellers and were not tested here. Check the manual that ships with the heater before installation.
Sources
- PetSmart Learning Center, “How To Care for Your Betta Fish,” https://www.petsmart.com/learning-center/fish-care/how-to-care-for-your-betta-fish/A0188.html (opened October 27, 2026).
- NT Labs, “Do I need a thermometer when there is a heater in my tropical aquarium?,” https://www.nt-labs.com/knowledge-hub/do-i-need-a-thermometer-when-there-is-a-heater-in-my-tropical-aquarium/ (opened October 27, 2026).
- Merck Veterinary Manual, “Providing a Home for Fish,” https://www.merckvetmanual.com/all-other-pets/fish/providing-a-home-for-fish (opened October 27, 2026).